I’ve recently added the ability to to new posts on my website. In this post, I’ll show you how I did it.
Basic Requirements

All I’ll need is a way to store dynamic data (email addresses) when a user clicks a button. I’m building this website from scratch, and this is the first dynamic data I need to manage, so I’ll want to store it long-term in a database.
The steps I’ll take are:
- Create the SUBSCRIBE button.
- Write a function to send subscription data whenever the button is clicked.
- Create a database to store the data.
- Link the SUBSCRIBE button to the DB.
- Implement the button into the website.
Let’s get started.
1. Make a form
Let’s copy the Substack design:

We need to send data from our frontend over the internet, so I’ll want to use an HTML form. I’m also using shadcn-svelte to keep my components looking consistent, so I’ll try to use its components wherever I can. This looks like a good job for the Button Group component.
So I’ll install the component, edit the layout and styling, and package it up in a component for reuse.
<form method="post">
  <ButtonGroup.Root>
    <Input placeholder="Type your email..." name="email" />
    <Button type="submit">Subscribe</Button>
  </ButtonGroup.Root>
</form>
2. Send the data to the backend
In Svelte, data is typically sent using HTML forms - the email address is sent to the URL you specify using an HTTP request.
If I try using the button, I receive an error:
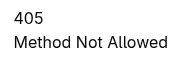
Our button is sending a request to the server, but the server doesn’t know what to do with it. We can tell it what to do by writing a form action:
export const actions = {
  subscribe: async (event) => {
    // Get the email
    const data = await event.request.formData();
    const email = data.get('email');

    // Send it somewhere
    const URL = undefined   # We don't know where the DB is yet! 💣
    const response = await event.fetch(URL, {
      method: 'POST',
      body: { email: email }
    })
  }
};
Then, we can adjust the subscribe form from step 1 to call subscribe():
<form action="?/subscribe" method="post">
  ...
</form>
Now we need to create a database to send the email address to.
3. Create my database
Select a type
I’m not expecting much load from my 3 readers (much love ❤️), so I’d like something cheap and secure.
Supabase should do nicely - it’s an open-source project based on PostgreSQL DB, and comes with an API to securely access the data in your tables. Plus, it’s free for small projects.
Create User table
All the info I need:
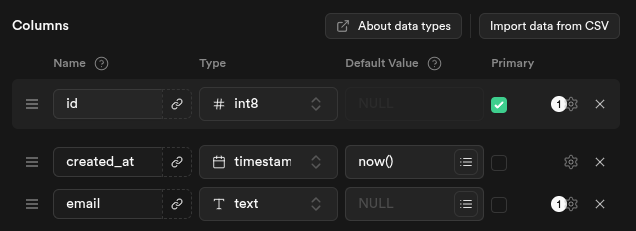
If a subscriber wants to unsubscribe, we can simply delete the record from our table.
4. Link the button to our DB
Supabase was deployed on a server in Step 3 - now we need to find where it’s located, and get the frontend talking to it.
Supabase has great documentation on connecting our SvelteKit app to Supabase. It showed me how to perform CRUD operations using some simple JavaScript syntax:
export const actions = {
  subscribe: async (event) => {
    // Get the email
    const formData = await event.request.formData();
    const email = formData.get('email');

    // Save it to the DB
    console.log(`email: ${email}`)
    const { error } = await supabase.from('subscriber').insert({ email });
    if (error) console.error(error)
  }
};
5. Implement the button
All we need now is to copy the Subscribe component wherever we want it to be visible. I’ve also added some styles for the loading, success and fail states.
If you read this far, try it out below.